After learning how to increase, you will need to know how to decrease. Crochet decrease is creating one unique stitch from two previous stitches. You can find two techniques : the classic decrease and the invisible decrease crochet. Personally, I always use the Invisible technique because it’s not more complicated and the result is cleaner. If you want to make amigurumis, I suggest you to make invisible decreases.
The difference between those two techniques is due to the loops of the stitches you use to create to reduction. For a classic decrease, both loops ( front and back ) of each stitch are used. Conversely, only the front loops are used during the so-called » Invisible » technique. It is for this reason that it is way less visible in a work.
Step-by-step pictures
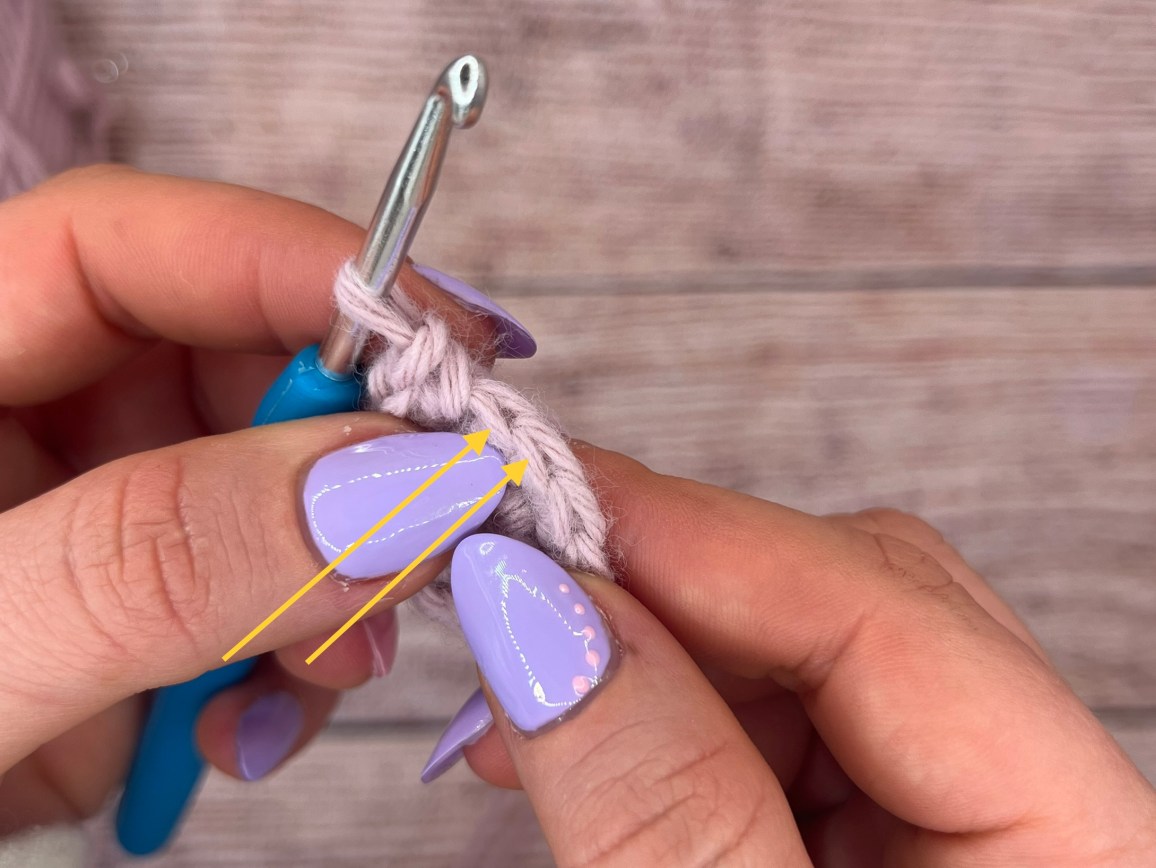
Step 1 : Visualize the front loops of the two stitches you want to decrease

Step 2 : Insert your hook in both of them


Step 3 : You now have the two front loops on your hook

Step 4 : Make a yarn over

Step 5 : Pass the yarn over thread through the 2 loops. Then, you have 2 loops left on your hook

Step 6 : Make a second yarn over and pass it through the 2 loops. You have one loop left on your hook and your invisible decrease is done

» Invisible decrease crochet » video
In this tutorial, you will learn how to single crochet increase on a chain and in a round.
Resume


________________________________
» Crochet basics » articles and videos : here 🌸
________________________________
Find all my free crochet patterns here 🌸