CROCHET SUPPLIES TO START CROCHETING 🧶🇺🇸

Hello little pumpkins, today I decided to write an article about all the supplies and tools you need if you plan to start crocheting. This post will be about general crochet and, more especially amigurumi.
When I first started crochet, it took me a while to understand the usefulness of each material / supplies. This article will therefore be an enumeration and explanation of what a crochet set for beginner contains. As always, I write according to my personal experience, but each crocheter has its preferences about tools that he/she uses. You will find yours 😊
Crochet supplies list to start crocheting 🧶
To start crochet and making Amigurumis, you will need :
- Hooks
- Yarn
- Stitch markers
- Round counter
- Safety eyes
- Toy stuffing
- Darning needles
If you are wondering where to buy crochet supplies, I bought all of mine on Amazon. The links are added in Italic. Without counting the price of the wool, about $50 was enough to purchase my beginner crochet set.
YouTuve video
Hooks

Use
Let’s start with the most logical : you will need hooks. You will find many types but the use is always the same. It is a stick that has a hook at the tip. It allows to catch the thread and pass it through the stitches.
The main difference between knitting and crochet is the number of needles held in hands. Contrary to knitting ( 2 needles ), the hook is used by itself. You will hold it with the left or the right hand according to your preference. Personally, I am left hander but it didn’t make much difference when I learned. If you watch tutorials, you will simply need to reverse hand roles.
The different sizes
What size to use?
During your crochet supplies choice, the sizes of the hooks are important.
Generally, crochet sets come with multiple sizes of hooks. It usually varies from 2.75mm (C2 ) to 8mm (L11). The number in millimeters (mm) is the diameter of the tip. However, hooks can be smaller or way bigger (jumbo 25 mm). However, if you are a beginner, I recommend you start with a 3.5 mm (E4) or a 4 mm (G6) hook. Below, the very small stitches are difficult to visualize and you can get lost counting them. More you crochet, more you get used to see in which stitch you have to put the hook.

Therefore, the smaller the hook, the smaller and more detailed your creation will be. Generally, to make amigurumis, you will need hooks between 2.5 mm (B1) and 3.5 mm (E4). It is recommended to use cotton for these types of hooks ( see yarn chapter )
Contrariwise, with bigger sizes of hooks ( 7mm (L11) and more ), you will make bigger creations or stuffed animals such as Leon my teddy bear. Also, there are special balls of yarn for these types of work. The yarn is way thicker like for example the Super Happy Chenille range from DMC or the Baby Blanket yarns from Bernat ( I am obsessed with it ).
If you choose a thick yarn, it will be difficult for you to make small creations because the density of the thread must be relatively proportional to the size of the hook.
More details about crochet yarns : here
Example

Here is the difference between a project made with a 2mm hook and one with a 3.5mm hook (same thread, same stitches). Thus, you can see that the size of hook has increased the size of the creation. Also, when the hook is small, the stitches tighten, and your amigurumi will be more rigid once stuffed.
If you use a hook that is bigger than recommended, the stuffing could come out between the stitches.
Do not worry, if you are a little confused when choosing yarns, the labels indicate a recommended hook size. Either with a hook symbol or with needles as circled on the picture.

The different materials
Aluminum with rubber grip

They are the ones that I use. My hooks come from an Amazon set that I bought when I started crochet. They are ergonomic and adapt perfectly to the shape of my hands and therefore, are very COMFORTABLE ! It’s very important to choose hooks that do not hurt your hand. At first, you will not notice it and then pain ( hand, wrist.. ) can occur after months of using the wrong type of hook. Here is a link of good crochet beginner set : here. It also contains stitch markers and darning needles that you don’t need to buy separately
I’ve never seen hooks specifically for left-handed people but I do know that the ones with ergonomic rubber grips are recommended.
All Aluminum

They take up less space than those with rubber but are less comfortable. The good thing about them is that they don’t slip from the palm of the hand ( the rubber can be slippery after few hours ).
Bamboo

In my opinion, they are not the best in terms of use. If the finishing of the hook is not perfect, it can snag your thread and therefore splits it. However, I own a few as they are adapted for air travel (cabin luggage). At the airport, going through security, officers can confiscate metal hooks or needles considered as dangerous. With those in bamboo, I never had a problem. So I take them with me in the cabin and I leave my aluminum hooks in the check-in luggage. Here is the link of my bamboo hooks set : here.
All plastic
Personally, I don’t own any but I know that some crocheters are big fans of them. They are light, have a good grip and the choice of colors is wide. They are usually used for large pieces and wool creations.
Jumbo crochet sets : here
Like the bamboo hooks, I do believe they can be used on airplanes because they have no metallic parts.
Conclusion
To summarize, when choosing your crochet supplies as a beginner, think about the size you want for your project as well as the yarn you want to use ( see yarn article ). And, it will tell you which hook to choose.
Also, my advice is to try several types of hooks in order to find the one that suits your hand.
Stitch markers

When choosing your crochet supplies, you may have wondered what are these little colorful things sold with crochet sets. Small but essential for the success of your work.
Use
Stitch markers are used to signal a precise location in a your work. Crocheters mainly use them to visualize when a round is complete. Here is the explanation :
If you’ve ever read a crochet amigurumi pattern, you’ve probably noticed that some lines correspond to rounds. At that crocheting multiple rounds will then make a distinct shape.
A round being a addition of stitches*, you will need a certain number of them for the round to be complete. In crochet patterns, this total number of stitches to have is often indicated in parenthesis ().
Thus, placed at the beginning of your round, the marker helps you count the stitches when you return to it. ( see example )
Note : if you don’t have a stitch marker, you can use a paper clip or a piece of yarn 😊.
*single crochet, slip stitch, increase, half double crochet, double crochet, treble crochet…
Where to place your marker ?
A stitch marker is placed on the first stitch of the round. When you finish your round, you then return to the marker. If the number of stitches indicated on the pattern is equal to the number of stitches you have ( counting the one with the marker and the last one made ), then your round is correct. However, if after counting, you are missing some, this means that you have forgotten a stitch. On the contrary, if you have too many, you may have crocheted twice in the same stitch.
Example
On the crochet pattern it says :
R1 : 6 single crochets (sc) in magic circle (6)
R2 : 6 increases (inc) (12)
R3 : (1 sc, 1 inc) x6 (18)


If you are right-handed, everything may seem reversed to you. But since the marker is always placed on the first stitch of the round, the counting begins with this one.
Round counter (manual clicker)

As its name suggests, it allows you to count the rounds 😅. It is essential when you do several rounds with the same number of stitches. It’s easy to get lost and one round more ( or less ) can change the visual aspect of your creation. With more experience, you will learn how to visualize the number of rounds you have made, but when you start crocheting it is part of the supplies to have.
Use
I advise you to click on the counter once your round is done and not at the beginning. Indeed, if I click at the beginning and I am distracted during the lap, I do not remember when I was when I resume. If I only click at the end, I know my round is over and I can move on.
Which one to choose ?
I personally choose to work with a manual clicker because I find it more reliable than the counters provided in crochet sets. The worst thing is to have a counter that goes wrong after few rounds and confuses you in your work. I purchased mine on Amazon and am happy with it. There is the link : here. I saw that it comes in pink as well : here ( so cute ).
Safety eyes

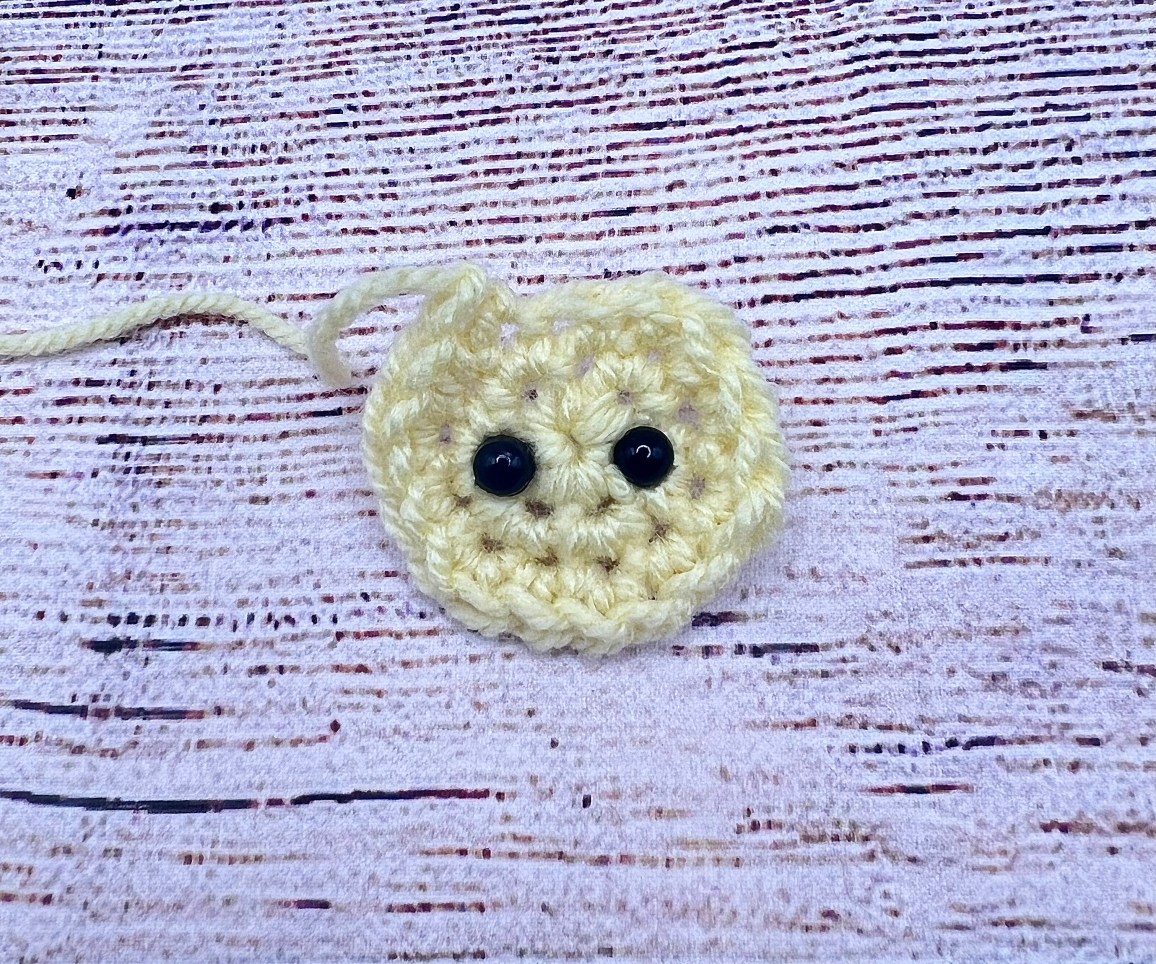
Safety eyes help bring your amigurumis to life. They are made of a black part with a screw and a transparent round piece. This last one slips around the screw. Once the two parts are clipped together, it’s very hard to separate them. It’s for this reason that they are called » safety eyes ».
How to place safety eyes ?
With a darning needle, widen the stitch in which you want to put the eye. Insert the screw in your work and then, place the round transparent piece on the back ( inside your work ). Be careful not to close your creation before putting the eyes. If closed, you will no longer have access to the interior and therefore no longer be able to attach the two parts together.


Different types of safety eyes
They come in a variety of styles : black, colored, with an iris, for specific animals.. For now, I only use the black ones and I give them different expressions thanks to a white thread wrapped around it (see pictures).


Generally, they are sold in sets containing different diameters ( 6mm , 9mm, 10mm … ). The sizes are then chosen according the desired face expression for the amigurumi. The supplies section of a crochet pattern will indicate the required size.
Here is the link of the safety eyes that I use. Contained in a box of 200 pieces, sizes go from 6mm to 12mm : here .
Oval kawaï eyes : here
Round kawaï eyes : here
Stuffing
If you are new to crocheting and more especially amigurumis, stuffing can be confusing when picking your crochet supplies. Just like stuffed animals, your amigurumis will have some inside to give them a structure. Without it, it would be impossible to see the final shape of your work.
Different types of stuffing
Polyester fiber fill

Globally, to make amigurumis we use polyester fiber fill also called Fiber fill. It is 100% polyester material with high filling power. It comes in bags with different quantities ( 32, 16, 12… ounces ).
Most are machine washable, some are recycled and non-allergenic depending of the brand. I always go for one of the most famous brand in the US : The Poly-Fil fiber fill. Here is the link on Amazon.
Siliconized polyester fill

You can also find siliconized polyester fill that will perfectly fill your crochet works. However, the fibers disperse a lot, you will quickly have them everywhere and it is also a little more expensive. I ordered some once but not being convinced by it, I will not indicate a link.
Polystyrene beads
Finally, I saw that there are polystyrene beads for filling. Personally, I’ve never used it, I would be too afraid that the beads would slip through the stitches and that my creation would gradually empty.
How to stuff your crochet work ?YouTube video
As a beginner, it can sometimes be difficult to judge how much stuffing you need. I advise you to add some little by little and look at the result each time. When there is not enough, the stitches do not stretch and the expected shape is not precise. Conversely, if you add excessively, the stitches stretch too much and your amigurumi will be deformed. If you added safety eyes, the round transparent part pushes against the inner wall and the screw can fall out.
Basically, If you have crocheted a round, a well-done stuffing will give you a perfectly round shape.
Darning needles

What is a darning needle ?
Sold in most crochet sets, these thick needles have a larger eye than sewing needles. Also called wool needles, they therefore adapt to thick threads ( wool, acrylic, polyester… ). They are made of metal or plastic. I prefer using the metallic ones because they don’t twist.
Use
They are used to assemble amigurumis or to sew elements. After crocheting different parts such as the head, the arms, the body …, insert the remaining thread into the eye of the needle an sew them together according to the pattern. There are several techniques but the simplest is to symmetrically align the stitches of the parts and pass the yarn inside and out. First, I recommend pinning the items together and then sewing.
Yarn


Three major types of yarn are used in crochet : cotton, polyester and acrylic. Click here for my more detailed article about yarns.
Conclusion
I hope this article about crochet supplies for beginners will be useful to you. As I said before, trying several tools will help you find the ones that suit you. If you have further questions do not hesitate to contact me by clicking here . I will be happy to answer to you 🥰
Now all equipped, find my all free patterns here. Simple to follow, they are suitable for beginners or confirmed crocheters.


_________________________________
Share your creations with me on Instagram

@crochetpinkpumpkin or using the hashtag #pinkpumpkinpasttern
_________________________________

27 Comments